Crayon Resist Design
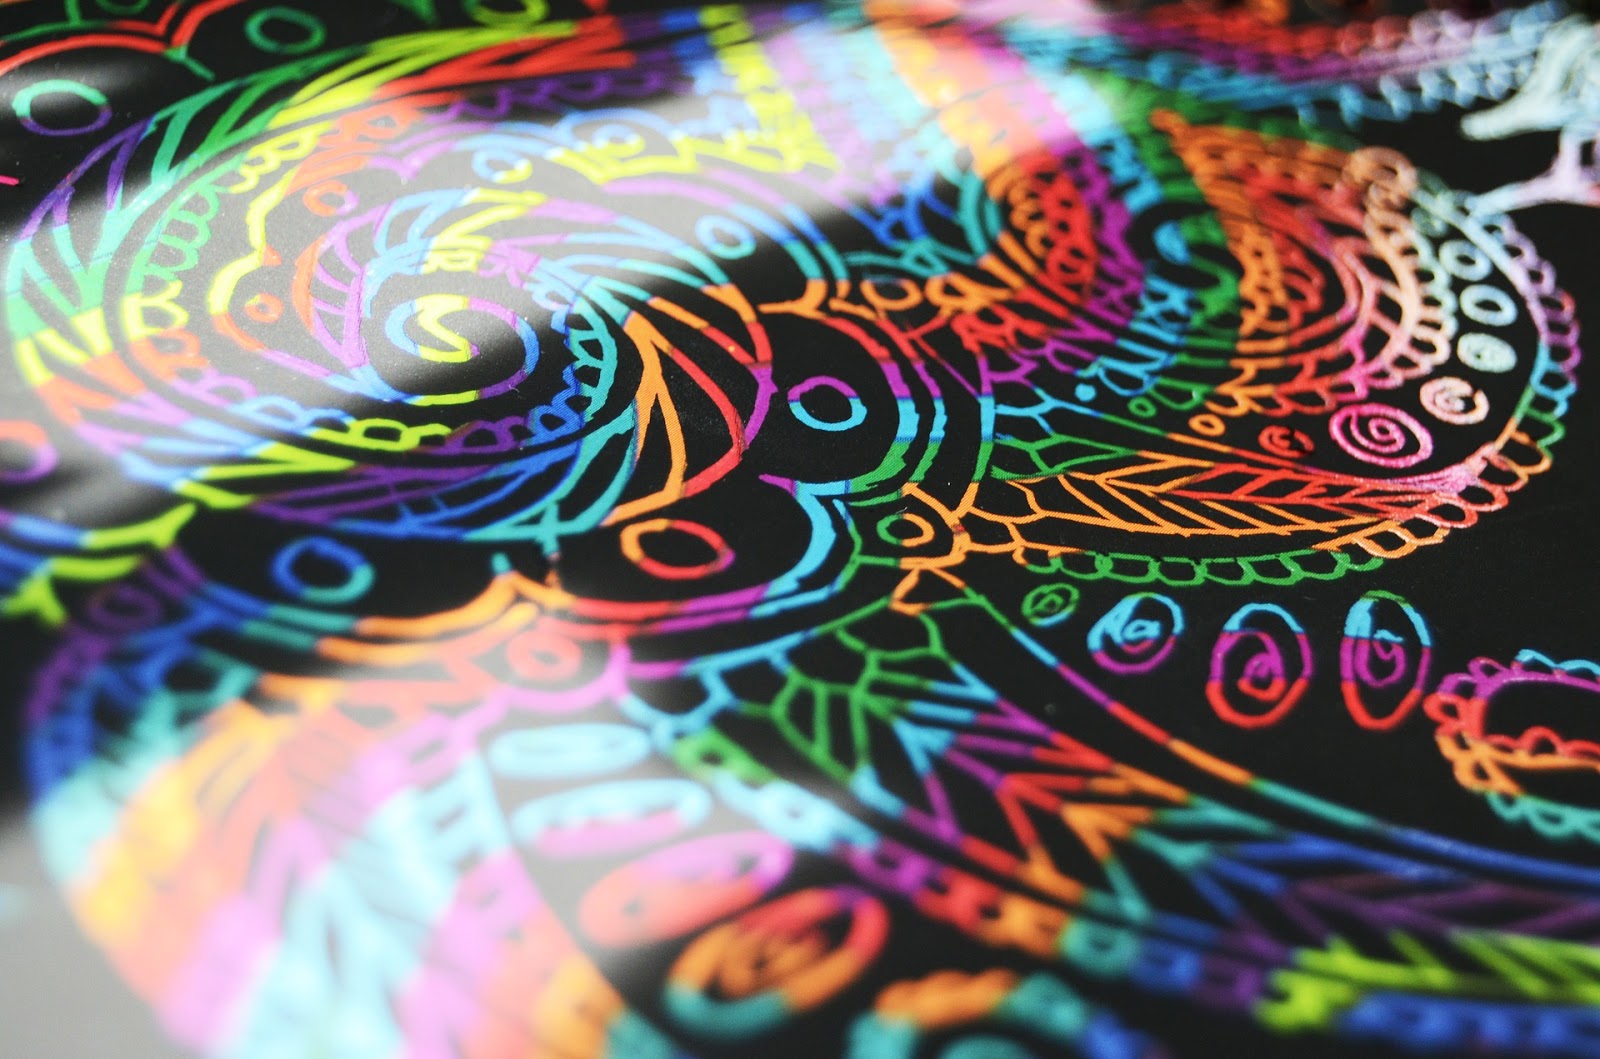 |
| Crayon Resist, Design |
Suitable for Kindergarten to Third Grade
- students will create a beautiful design
consisting of vibrant colors and
contrasted with black paint
consisting of vibrant colors and
contrasted with black paint
- crayon/oil pastel splashes of color are
made on art paper
- it is followed up with a wash of black
watercolor paint to create a contrast
of color and art mediums
Materialsmade on art paper
- it is followed up with a wash of black
watercolor paint to create a contrast
of color and art mediums
- crayons or oil pastels
- black watercolor paint
- paint brushes
- white art paper
Procedure
- black watercolor paint
- paint brushes
- white art paper
Procedure
- using crayons or oil pastels make designs on art paper
- emphasize the need to press heavily in order to create the most vivid contrast of colors
and the colors will show through the black paint
- also demonstrate that there needs to be spaces of white left on the paper so that the black
paint adheres to the paper
- continue to change colors and textures until the page is filled with designs
- cover work surfaces with newsprint or plastic cloths
- check to see if the paint is too thick on a sample page of random crayon, oil pastel
designs (you may need to water the paint down a little to achieve the right consistency)
- brush the black watercolor paint on the paper using horizontal strokes, allowing each
stroke to go off the page (this will make sure that the entire surface is covered and no
white spots remain)
- this art lesson can be modified for young children by having them draw or even scribble
random colors on the paper, being sure that they press heavily and use an array of colors
Another great crayon resist activity can be found at Crayon Resist Collage